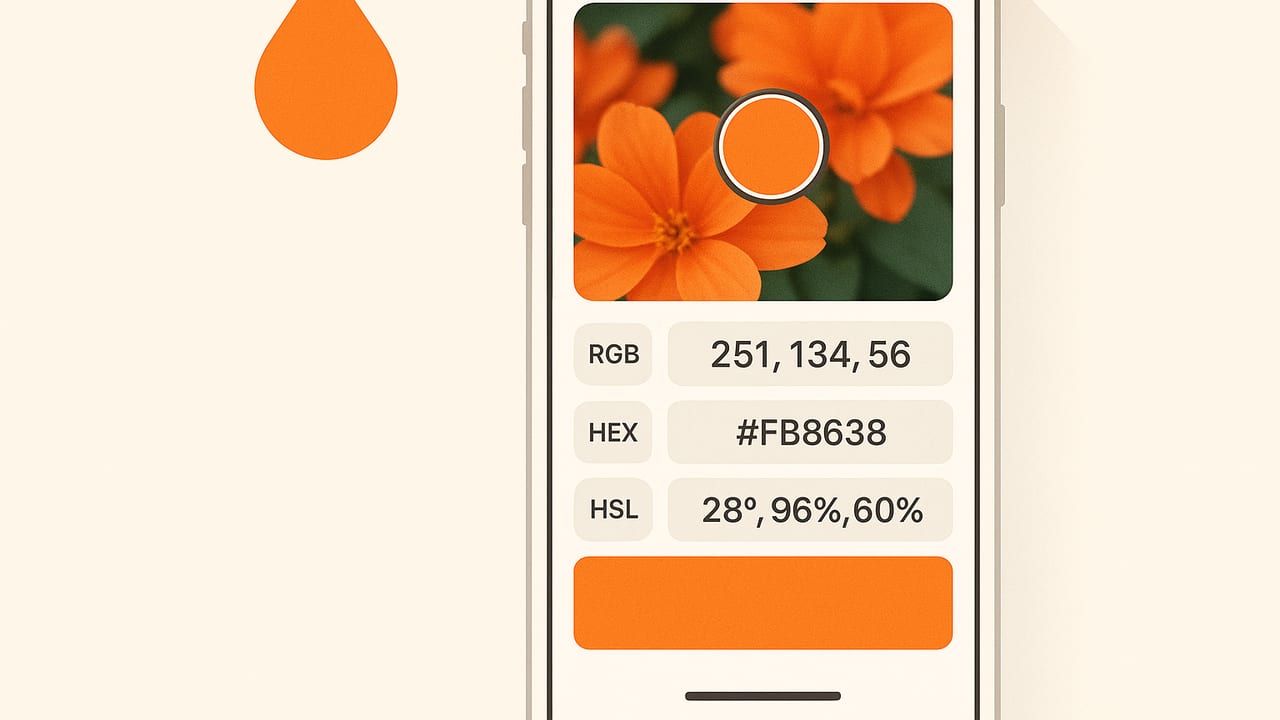
Transforming real-world visuals into reliable color values is a daily task for designers, decorators, and brand builders. Whether you’re matching paint to a favorite textile, lifting a hero color from product packaging, or pulling a web-ready palette from a photograph, you need a dependable way to extract RGB, HEX, and HSL values on the go. This guide walks you through workflows, accuracy tips, and practical methods for turning any iPhone photo into a precise set of color values with a free iOS tool for RGB, HEX, HSL.
Why extract colors from photos on iOS?
Modern iPhone cameras capture nuanced color in high dynamic range and wide gamuts. That means you can quickly translate mood, material, and environment into actionable color data—without a desktop. On-location color capture is especially useful when:
- Interior designers need to match textiles, flooring, or paint chips.
- Graphic/UI designers want to sample brand colors from signage, print, or screens.
- Photographers build palettes from shoots to guide grading and retouching.
- Marketers translate real-world moments into digital brand assets.
By learning a simple, repeatable process, you can go from photo to palette in minutes—accurately.
Quick-start workflow: from photo to RGB, HEX, HSL
- Capture or import: Take a well-lit photo of your subject. Avoid mixed lighting (e.g., daylight + tungsten). If possible, shoot multiple angles and exposures.
- Open a color picker: Use a free iOS tool for RGB HEX HSL extraction that supports sampling from the photo and shows values instantly.
- Sample thoughtfully: Drag the picker over target areas. For textured surfaces, use an average/blur sampling mode if available to reduce noise.
- Record values: Note the HEX (for web), RGB (for print and dev handoff), and HSL (for intuitive adjustments). Save as a named swatch or palette.
- Export: Share colors as HEX text, ASE/CLR swatches, or images. For workflows like Figma or Procreate, export to their compatible formats.
Tip: Sample multiple points and take the median to avoid highlights or shadows biasing the color.
RGB vs HEX vs HSL (and HSB): what to use and when
Different deliverables call for different color models. Here’s a snapshot to guide your choice:
| Model | Typical Use | Value Range | Pros | Watch-outs |
|---|---|---|---|---|
| HEX | Web/CSS, design handoff | #RRGGBB or #RRGGBBAA | Compact, universal on the web | Opaque by default unless using 8-digit HEX |
| RGB | Dev handoff, print pipelines | 0–255 each (or 0–1 floats) | Direct mapping to device channels | Not intuitive for adjusting lightness/saturation |
| HSL | Palette creation, design tuning | H: 0–360°, S/L: 0–100% | Intuitive edits (lighter, more saturated) | Convert back to RGB/HEX for production |
| HSB/HSV | UI pickers, digital art | H: 0–360°, S/B: 0–100% | Good for brightness-oriented control | Brightness differs from HSL lightness |
Choosing a free iOS tool for RGB HEX HSL values
When evaluating options, use this criteria checklist to ensure reliable results:
- Accurate readout: Immediate display of HEX, RGB, HSL, and optionally HSB values with consistent rounding.
- Sampling modes: Point and average sampling, configurable sampler size, and a zoom loupe to avoid mis-taps.
- Wide gamut awareness: Correct handling of sRGB vs Display P3 so values match your destination.
- Palettes & naming: Save re-usable palettes, rename swatches, reorder colors, and add notes.
- Exports: Copy/paste HEX, export PNG/JPEG palette cards, and format support for ASE/CLR/Procreate swatches.
- Non-destructive: Works with original photo resolution and metadata, with no unexpected color shifts.
Accuracy: the essentials
Color accuracy begins before you sample. Follow these steps to minimize error:
- Lighting: Use a single, even light source. Daylight (open shade) is reliable; avoid mixed color temperatures.
- White balance: Tap to focus and lock exposure/white balance on your iPhone. A gray card helps if you have one.
- Surface gloss: Glossy or metallic surfaces introduce specular highlights. Sample matte areas or slightly off-angle.
- Gamut: iPhone photos may be in Display P3. Many exports target sRGB. If your final deliverable is web, preview in sRGB.
- Averaging: For fabrics/wood grain, average a small area (e.g., 5×5 pixels) rather than a single pixel.
Swift example: sample a pixel and convert to HEX/HSL
If you’re building your own iOS workflow, this minimal Swift snippet shows how to sample a pixel color from a UIImage and derive RGB, HEX, and HSL.
// Sample a pixel color from a UIImage at a given point (image space)
import UIKit
import CoreGraphics

func color(at point: CGPoint, from image: UIImage) -> UIColor? {
    guard let cgImage = image.cgImage else { return nil }
    let width = cgImage.width
    let height = cgImage.height
    guard Int(point.x) >= 0, Int(point.y) >= 0, Int(point.x) < width, Int(point.y) < height else { return nil }

    var pixel: [UInt8] = [0, 0, 0, 0]
    let colorSpace = CGColorSpaceCreateDeviceRGB()
    let bitmapInfo = CGImageAlphaInfo.premultipliedLast.rawValue

    guard let context = CGContext(data: &pixel,
                                  width: 1, height: 1,
                                  bitsPerComponent: 8, bytesPerRow: 4,
                                  space: colorSpace, bitmapInfo: bitmapInfo) else { return nil }

    // Translate so the desired pixel lands at (0,0)
    context.translateBy(x: -point.x, y: CGFloat(height) - point.y - 1)
    context.draw(cgImage, in: CGRect(x: 0, y: 0, width: width, height: height))

    let r = CGFloat(pixel[0]) / 255.0
    let g = CGFloat(pixel[1]) / 255.0
    let b = CGFloat(pixel[2]) / 255.0
    let a = CGFloat(pixel[3]) / 255.0
    return UIColor(red: r, green: g, blue: b, alpha: a)
}

// HEX and HSL helpers
extension UIColor {
    struct HSL { let h: CGFloat; let s: CGFloat; let l: CGFloat } // h° 0–360, s/l 0–100%

    var rgb255: (r: Int, g: Int, b: Int, a: Int) {
        var r: CGFloat = 0, g: CGFloat = 0, b: CGFloat = 0, a: CGFloat = 0
        getRed(&r, green: &g, blue: &b, alpha: &a)
        return (Int(round(r * 255)), Int(round(g * 255)), Int(round(b * 255)), Int(round(a * 255)))
    }

    var hexString: String {
        let c = rgb255
        return String(format: "#%02X%02X%02X", c.r, c.g, c.b)
        // For alpha: "#%02X%02X%02X%02X"
    }

    var hsl: HSL {
        var r: CGFloat = 0, g: CGFloat = 0, b: CGFloat = 0, a: CGFloat = 0
        getRed(&r, green: &g, blue: &b, alpha: &a)

        let maxC = max(r, g, b), minC = min(r, g, b)
        let l = (maxC + minC) / 2.0
        var h: CGFloat = 0, s: CGFloat = 0

        if maxC == minC {
            h = 0; s = 0
        } else {
            let d = maxC - minC
            s = l > 0.5 ? d / (2.0 - maxC - minC) : d / (maxC + minC)
            if maxC == r {
                h = (g - b) / d + (g < b ? 6 : 0)
            } else if maxC == g {
                h = (b - r) / d + 2
            } else {
                h = (r - g) / d + 4
            }
            h /= 6.0
        }
        return HSL(h: h * 360.0, s: s * 100.0, l: l * 100.0)
    }
}

// Usage:
if let uiColor = color(at: CGPoint(x: 120, y: 240), from: myImage) {
    let rgb = uiColor.rgb255           // (r,g,b,a) in 0–255
    let hex = uiColor.hexString        // e.g., "#3FA27C"
    let hsl = uiColor.hsl              // h°/s%/l%
    print(rgb, hex, hsl)
}
This example reads a single pixel. For more consistent results on noisy textures, average a small area by sampling several adjacent points and averaging their RGB before conversion.
Practical workflows by discipline
Interior design and decor
- Photograph the space or material under steady, neutral lighting.
- Sample three to five areas on the target surface, avoid highlights.
- Average the results; save a named palette with room/fixture notes.
- Export HEX for moodboard software and RGB for contractors or visualizers.
Branding and marketing
- Capture signage, packaging, or uniforms with consistent exposure.
- Sample primary, secondary, and accent colors; include neutrals.
- Store HSL values to fine-tune saturation/lightness across assets.
- Export an ASE swatch for Adobe or a palette image for quick review.
UI/UX and web
- Take a screenshot or photo of the target UI element.
- Sample foreground and background states (default/hover/active).
- Record HEX for CSS and HSL for variations (hover/disabled in design specs).
- Document contrast ratios separately to ensure accessibility.
Exporting your palette
A strong color workflow ends with easy handoff. Look for these export paths in your iOS tool:
- Copy/paste: Tap to copy HEX or RGB to clipboard for instant use.
- Palette cards: Export a PNG/JPEG card with swatches, labels, and codes.
- Swatch files: Export ASE (Adobe Swatch Exchange) or Apple .clr for macOS apps; Procreate users can import .swatches.
- CSV/JSON: For dev pipelines, export structured data including HEX, RGB, HSL, and names.
Common pitfalls and how to avoid them
- Mixed lighting: If daylight mixes with warm tungsten, your sample shifts. Turn off indoor lights or move to shade.
- Auto enhancements: Disable smart filters that add saturation or contrast before sampling.
- Gamut mismatches: iPhone wide-gamut (Display P3) colors can look different in sRGB. Soft-proof by converting to sRGB when targeting the web.
- Compression artifacts: Heavily compressed images introduce color blocks. Sample from the original when possible.
- Edge halos: JPEG edges can bleed. Sample well inside the target area.
A simple mental model for better palettes
If you’re building a palette from a single hero color sampled from a photo, use HSL to create a cohesive system:
- Base color: Your sampled hue (H), with original saturation (S) and lightness (L).
- Light/dark variants: Keep hue and saturation, adjust lightness by ±10–20% for UI states or shadows/highlights.
- Muted counterpart: Reduce saturation by 15–25% for backgrounds and secondary text.
- Accent: Rotate hue ±30° and bump saturation for an accent that remains harmonious.
Once you’ve established these relationships in HSL, convert back to HEX/RGB for delivery.
Checklist: dial in your mobile color workflow
- Use even, single-source lighting and lock white balance.
- Sample multiple nearby pixels; average for realism.
- Record HEX, RGB, and HSL for flexibility across deliverables.
- Export both palette visuals and swatch files for teammates.
- Verify colors in sRGB if your destination is the web.
FAQ
Do I need HSB if I already have HSL? Not strictly—both are perceptual models. Designers often prefer HSL for intuitive lightness control; illustrators may prefer HSB’s brightness. You can keep one as your working model and convert as needed.
What precision should I use? For HEX, 6 digits is standard. For RGB, integers 0–255. For HSL, degrees and whole percentages are typical. Keep internal calculations at float precision to avoid cumulative rounding error, then round for display.
How do I handle transparency? Use RGBA or 8-digit HEX (#RRGGBBAA). HSL doesn’t encode alpha; keep alpha separate.
Will my phone screen calibration affect sampling? Sampling reads image data, not what your screen displays, so it’s robust—however, verifying in your target color space (often sRGB) prevents surprises.
Final thoughts
With a clear process and the right feature set, your iPhone becomes a dependable color lab. Capture clean photos, sample smartly, store values in multiple models, and export in formats your collaborators use. That’s all you need to turn real-world inspiration into production-ready color systems with a free iOS tool for RGB, HEX, and HSL.
If you’re looking for a focused option, Color Viewfinder is an iOS and iPad app that extracts HEX, RGB, HSL, and HSB from photos, lets you customize palette layouts, and exports in multiple formats—core features are free with optional upgrades.
